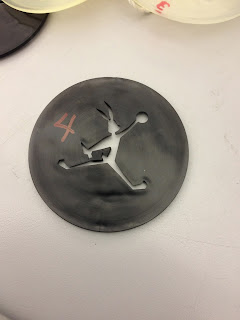
During our optimization runs for injection molding our parts, we had to vary and experiment with many different parameters such as the cooling time, feed stroke length, injection speed profile, and injection hold pressure profile. In this post, we will focus on the path we took to optimize the Bugs Bunny mold.
Our finalized parameters can be read on the Injection Molding Parameters sheet seen here.
We arrived at these final parameters through iteration. We would modify one parameter, and then run a couple parts to see if it changed the final part.
For Bugs Bunny, our process began by:
For Bugs Bunny, our process began by:
- Parts 1-3 were made using the default parameters, using 5.632" ejector pins plus a 0.045" shim.
- Parts 4-5 modified the velocity profile to prevent bouncing of the parts.
- Part 6 modified the velocity profile to prevent bouncing again. Profile modified to: 4,4,3,2,1.7,1.4,1.2,1,0.7,0.2
- Part 7 changed the shot size to 1.1 to allow for more plastic to fill the narrow gap around Bug's carrot.
- Part 8 reduced the shot size to 1.
- Part 9-10 changed the shot size to 0.9 to prevent dishing of the part, that was seen at a shot size of 1.
One design flaw that we had was that the channel between Bug's tail and the carrot is pretty small. We should have made that passage wider, so that plastic could more easily flow into this area. Additionally, when the part was ejected from the machine, it was often bent resulting in a not flat part.
If we could do this again, we'd probably design the part so that the plastic wasn't so thin in that area.
We also noticed that Bugs didn't appear to be centered on the disk. We stuck the part in the lathe, and found that the design was actually centered, but the cavity hole wasn't centered properly.
We weren't really sure how this happened, but we made another part by facing the part in the lathe and then turning a new mold. We didn't end up changing the dimensions of the part at all though.
With the new mold, we ran some more trials on the machine.
- Parts 1-5: The part wasn't lying flat again, so we changed the cooling time to 10 seconds.
- Part 6: Changed the cooling time to 8 seconds, and the feed stroke to 1.0.
- Part 7 & 8: Utilized mold release, part came off really flat!


No comments:
Post a Comment
Note: Only a member of this blog may post a comment.